I recently began working quietly on one of my better-kept secrets: I want to build a full set of stormtrooper armor. I’ve never really built a costume before – just your typical stuff in grade school, nothing crazy – but I’m tackling the creation of screen-accurate stormtrooper gear. How cool is that‽ (Strangely, I think that’s the first time I’ve used an interrobang here.)
So, what does this entail? Well, it’s quite overwhelming at first, to be honest. The fastest, cheapest method is to buy a set outright, but where’s the fun in that? It’s not just about having the armor for me – I want to experience the *build* of it, see its creation through from the very beginning.
With that established, how do you go about starting something like this? I’ve found there to be a sufficient lack of cohesive tutorials on this, the most prevalent of which seeming outdated. Up until recently, the only way I ever saw for building something like this was by doing a full-body mold. Well, sitting for hours with hazardous chemicals over my face and body wasn’t very enticing! Not to mention I’d need a number of friends to help with the entire process. I wanted something I could work on here and there, independent of others. Fortunately, that option’s available now, where as a few years ago it wasn’t. Enter Pepakura.
Pepa-what-now?
Pepakura seems to be a relative newcomer to the costuming masses, having become popular over the last few years. Pepakura is a Japanese word for “papercraft”, something with which I was vaguely familiar thanks to D&D. From what I understand, this technique is nothing new, but rather, it’s been made much more accessible to the general public thanks to the tools from Tama Software. From the official site:
Pepakura Designer allows you to create paper craft models from 3D data. Pepakura Designer is developed in Japan and has been translated to English. We encourage you to create original designs and respect the copyrights of others.
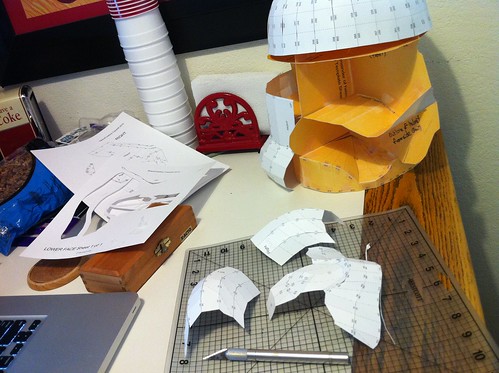
Fortunately, the costuming community has exploded with a plethora of templates and information. I grabbed the ANH stormtrooper helmet template from SpaceCowboy to get started. From what I’ve read, there are some newer, more-accurate models now, and I could re-print it with the glue tabs, but I think this is more than okay for my first foray into things.
 Cutting area with the dome and back of helmet assembled
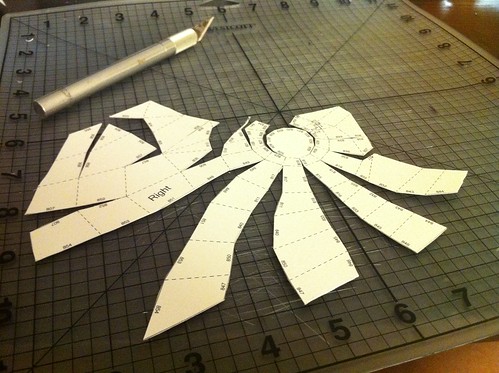 Left ear cut but not folded
 All-in-all, there were 31 sheets of pieces to cut out, and I’ve cut and folded all but part of the ears and eyes, but I still have to assemble some of the completed pieces, which are giving me trouble.
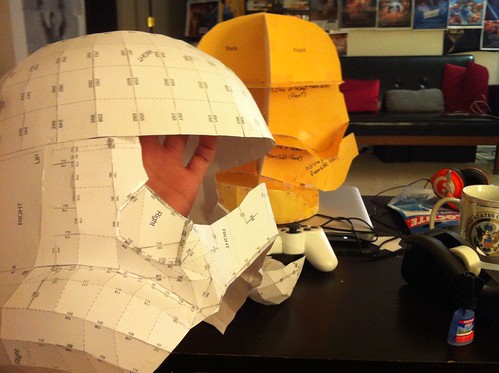 Helmet partially assembled and held up against the mannequin-like template
I’m aiming to get the lower face attached tonight, and the eyes tomorrow. After that, I need to decide if I should resin it, then attach the ears, or do it the other way around. I’ll have to do some more reading and see what’s recommended. I look forward to the completion of the helmet, but also dreading what comes next: applying a resin coat to the interior and exterior. There will be no second chances here. If I screw up and ruin the template, I’ll have to start over, and I definitely wouldn’t want that!

Twitter
Google+
Facebook
Reddit
LinkedIn